Tuesday, January 10, 2012

Chewy Oatmeal Chocolate Chip Cookies

I’m always trying to make “new” recipes.  You know……something that no one else has the recipe for.  When people try what I make, I want them to be ahhhhhmazed by my flair and sophistication in the kitchen.

Who am I kidding?  I like to wrap stuff in bacon and go extra heavy on the caramel sauce.  Isn’t that what baking and cooking is really all about?

So yesterday I decided to go with an old stand-by.  A recipe I had long ago swiped from the lid of the Quaker Oats Oatmeal and tweaked up to my exclusive baking standards (i.e. extra chocolate chips and cinnamon).  For your eating pleasure I present to you……….

Chewy Oatmeal Chocolate Chip Cookies
Ingredients
·        1/2 cup (1 stick) + 6 tablespoons butter, softened
·        1/2 cup granulated sugar
·        3/4 cup firmly packed brown sugar
·        2 eggs
·        1 teaspoon vanilla
·        1 1/2 cups all-purpose flour
·        1 teaspoon baking soda
·        1/2 teaspoon salt
·        1 1/2 teaspoons cinnamon…just one if you like a little less cinnamon, but you really should just trust me on this
·        3 cups rolled oats
·        An ENTIRE bag of semi-sweet chocolate chips

Some people will chose to add raisins to their ingredient list.  I would personally rather stir in a couple of roaches…….gag.
Via Pinterest…..From korinacaffeine.livejournal.com
Moving on.

Preheat oven to 350°F. Lightly grease two cookie sheets and set aside.

Beat butter, sugar, and brown sugar together on medium speed until smooth and creamy. Add eggs and vanilla and mix until well combined. In a separate bowl, mix together the flour, baking soda, salt, and cinnamon, then add to the butter mixture and beat until combined. Stir in oats and chocolate chips. 

Scoop dough into rounded tablespoons and place on baking sheets about 2 inches apart. Lightly press down to flatten each dough ball. Bake for 9-11 minutes until done…slightly brown on the edges. Cool 1 minute on cookie sheets; remove to wire rack and allow to cool completely. 
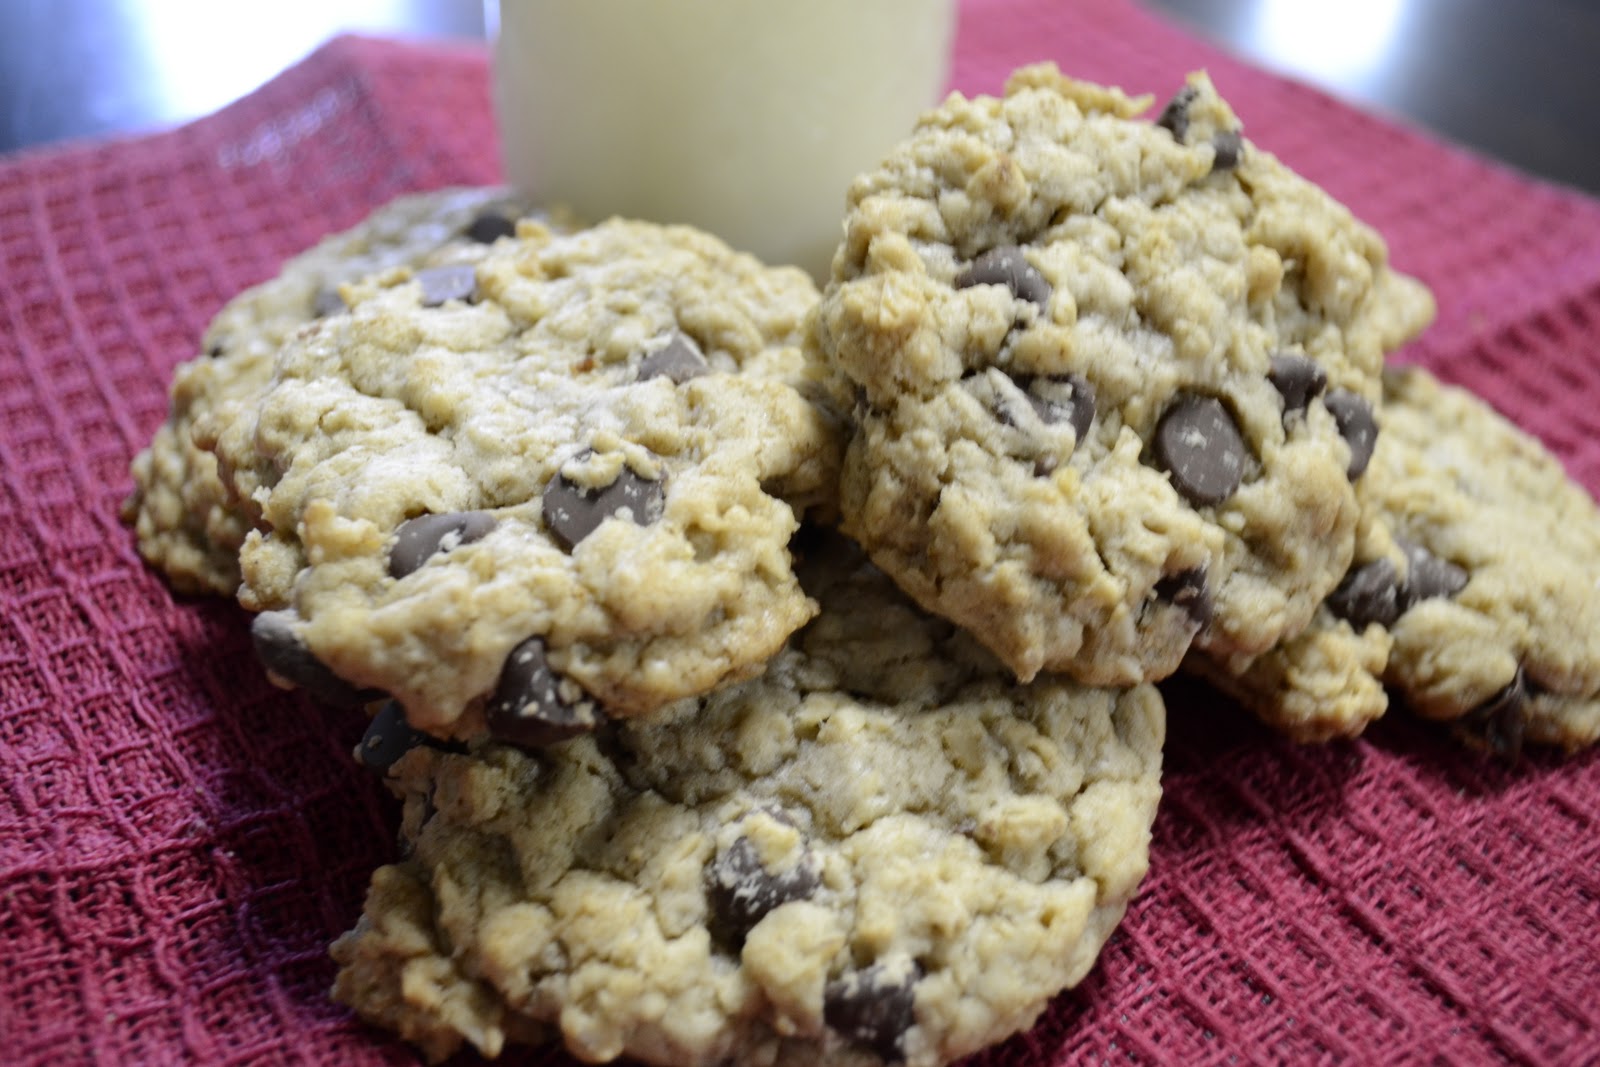
Makes about 3 dozen cookies. 

Thursday, January 5, 2012

Sticky Quickies

Kids are finally back in school.  Hot coffee.  Warm puppy next to me. Quiet.

It’s wonderful.

But in the back of my head I know I should get up and go EXERCISE.

It’s so hard.  I want to eat.
Sigh.

So, in honor of not bailing on several of my 101 Goals for 2012 in just the first week of January, I just poured myself a protein shake and I will blog about one of my family’s favorite breakfast treats.  Sticky Quickies.  If I can’t eat it, I might as well dream about it.....right? 
I got this recipe from my good friend years ago.  I usually save it for company or holidays not because they are hard to make, but because they are so gooey good in your tummy, but not quite as good stuck to your behind and thighs. 

My friend noted on the recipe that “you’ll never slave over cinnamon rolls again” and that “they remind her husband of sex.”  She was right.  I have never made cinnamon rolls since and somehow the word “quickie” in a recipe is never overlooked by my husband either. 

*Note:  You will just have to deal with the pictures.  Try as I might, I cannot seem to get the full caramely, sticky, gooey, delightfulness, to present well in a photograph.  You will just have to trust me on this one.

Sticky Quickies


Ingredients:
·       1 1/2 cup flour
·        2 pkgs rapid rise yeast
·        ¾ cup milk
·        ½ cup water
·        ¼ cup margarine or butter
·        ¼ cup sugar
·        1 tsp. salt
·        1 egg
·        1 ¾ cup flour
Topping:
·        ¾ margarine
·        1 cup brown sugar
·        1 tsp. cinnamon
·        5 Tbls. White syrup
·        1 Tbls. Water
·        ¾ cup chopped nuts (optional....I don’t use them.)
Combine in a large bowl 1 ½ cup flour and yeast.  Set aside.  In a small saucepan, heat milk, water, margarine, sugar, & salt, till warm.  Pour into yeast and flour; add egg.  Beat on high speed for 3 minutes.  Stir in the remaining 1 ¾ cup flour by hand.  Dough will be sticky and look like this.  
Cover and let rise for 30 minutes.

Combine topping ingredients in saucepan.  Heat until melted.  Pour this into a 9 x 13 casserole pan.  Stir down the batter when it is finished rising & drop by large tablespoons onto topping. (Like this...about 5 or 6 rows of 4)
Bake for 15 minutes at 375 degrees.   Cool one minute, then invert onto serving tray. (I use a cookie sheet with sides.) 
I also serve with a powdered sugar/milk/drop of vanilla drizzle for those in my family who like that….EVERYONE.
So, there it is.  Make it.  You’ll love it.  I promise.  Now I am off to go on a run!  Oh wait!  No way could I end this post without the picture that my husband decided to "stage"....because he was sure he could get a better photo than I could.  Thanks Honey!  Gotta love you!


Sunday, January 1, 2012

Goal #31 Complete

Happy New Year 2012!

My bestest friend Becky came up with the idea of 101 goals in 2012.  Since I didn’t even come remotely close to finishing my 2011 goal, I thought adding 100 more was a perfect idea!  (BTW I ran 396 miles.....a little short of one thousand.)
So far I have thirty-one goals written down.  Goal #9 is to come up with 101 goals.
It’s rough, but I am thinking that by the time I finish, 2012 is going to be a pretty great year.
Goal #31 :  Write down the person you want to be in 2012......or any year for that matter. 

Tuesday, December 27, 2011

My Husband, The Videographer

Brian won a new video camera at a Christmas party this year.  All I can say is it took him about 12 hours to make/edit this……


Friday, December 23, 2011

Christmas Tree Shortbread Cookies

Lights are twinkling, Christmas music is jingling, and the hot buttered rum is errrr…….rumming.  Yes, the hot buttered rum is rumming.  Excitement and anticipation abounds at our house because it is Christmas Eve!


Amber, my youngest, is the most excited of us all.  Early this morning she sat at the table making a letter/picture for Santa.  (From the picture above you may note that we also need to do some spelling practice over this Christmas break.)


I made some cookies yesterday just so Amber could leave some with her note.  I have it on good authority that Santa often prefers a shortbread type of cookie…..like what you might have with some SleepyTime tea.  These cookies from Better Homes and Gardens looked like a good choice.  


Well HO-HO-HO to BHG!  Thanks for telling me that it will take about 2 hours to roll 396 little balls to complete the entire recipe!  After rolling 166, I gave up and settled for just fifteen cookies instead of three dozen.

Regardless of the effort, they are a perfect little buttery cookie and they are very cute, don’t you think?


Christmas Tree Shortbread Cookies

Ingredients:
·        1 cup butter softened
·        ½ cup sugar
·        1 Tablespoon milk
·        1 teaspoon vanilla
·        2 ¼ cups flour
·        Powdered sugar icing to drizzle
·        Decorative candies

In a large bowl beat butter with an electric mixer on medium to high speed for 30 seconds. Add sugar. Beat until combined, scraping sides of bowl occasionally. Beat in milk and vanilla until combined. Beat in as much of the flour as you can with the mixer. Using a wooden spoon, stir in any remaining flour. Remove 1/2 cup of the dough. Tint the remaining dough with green food coloring.

Preheat oven to 325 degrees F. For each cookie, use the green dough to shape ten 1/2-inch balls. On an ungreased cookie sheet, arrange balls in a row of four, topped by a row of three, then two, then one on top. As you arrange the balls, gently press them into each other. Use the plain dough to make a 3/4-inch ball and place it at the bottom of the tree for a trunk. Repeat with the remaining dough, leaving 2 inches between cookies on cookie sheet.

Bake for 10 to 12 minutes or until edges are light brown.  Cool on cookie sheet for 2  minutes. Carefully transfer cookies to a wire rack; let cool.  Drizzle icing back and forth over cookies to look like strings for lights.  Add decorative candies to icing.  Let stand until icing sets.


Give yourself a big gold star if you rolled ALL the little balls and made the 3 dozen cookies.  You are my hero.

Wednesday, December 21, 2011

Candy Cane Kiss Cookie Bark

I have been resisting making sugar cookies this  year. (Here’s My Fav. Recipe)  I just don’t have the energy to roll, cut, and decorate even though I LOVE them so.
But alas, it is Christmas.  I made soup, sixteen of my mom’s famous cheese balls, and even did a craft…..but no desserts or cookies.  My husband just isn’t satisfied with a bowl of M & M’s and the kids are begging to make some goodies to take to our neighbors.
I bought about one hundred bags of Hershey’s Candy Cane kisses because they always run out quickly at the commissary and those things are the bomb diggity.  But even I can’t eat one hundred bags.  (Okay, maybe I don’t have one hundred bags, but I have a lot.)  So I googled Candy Cane Kiss recipes, found one that was easy enough for my daughter to make, and dug deep into my Christmas soul to grant her and a friend permission to use my Kitchen Aid. 
Thank you Abbey & Sydney for helping me make these!  They will be perfect for Santa!
Peppermint Bark Cookies
(Recipe from www.recipegirl.com some ingredients
have been modified.)


Ingredients:
·        2 cups all purpose flour
·        1/4 teaspoon salt
·        1 cup (2 sticks) unsalted butter, at room temperature
·        1 cup granulated sugar
·        1 teaspoon vanilla extract
·        1 large egg yolk
·        1 bag semi-sweet chocolate chips
·        1 cup chopped Hershey's Candy Cane Kisses (or use crumbled candy canes)
Directions:
 1. Preheat oven to 350°F. Spray 13x9x2-inch metal baking pan with nonstick spray. Line bottom of pan with long strip of 9-inch-wide parchment paper, leaving overhang on both short sides of pan.
2. Whisk flour and salt in medium bowl. Using electric mixer, beat butter in large bowl until creamy, about 2 minutes. Gradually beat in sugar. Continue beating until mixture is light and fluffy, stopping occasionally to scrape down sides of bowl, about 3 minutes. Beat in vanilla, then egg yolk. Gradually add flour mixture, beating on low speed just to blend.
 3. Drop dough by the tablespoonful into prepared baking pan, spacing evenly. Using moistened fingertips, press dough to form even layer over bottom of pan. Pierce dough all over with fork.
 4. Bake cookie base until light golden brown and slightly puffed and edges begin to come away from sides of pan, about 30 minutes. Place pan on rack; immediately sprinkle chocolate chips over cookie. Let stand until chocolate softens, about 3 minutes. Spread bittersweet chocolate over top of cookie in thin even layer. Immediately sprinkle chopped candy cane kisses over the chocolate layer.
 5. Chill until chocolate is set.
 6. Using paper overhang as aid, lift cookie from pan and transfer to work surface. Using large knife, cut cookie into irregular pieces.


Linking up with........

The Sasse Life...uber cute blog!
Bassgiraffe's Thoughts Thursday Blog Hop

Ranch Goldfish

The girls have been out of school since Friday.  The weather is cool, and we are all staying inside baking and enjoying some much deserved rest.  

I took some pictures of the falling…..fallen leaves of the little Japanese maple in our backyard.

The girlies each did a huge puzzle at the dining room table.  It was two days of sister togetherness.


Tonight we are making chicken noodle soup.  It’s not homemade though.  What’s better than homemade????  According to Amber, “DOUBLE NOODLE Cup-O-Soup!”


For the rest of us.......those who are missing the “homemade love”.....I made some ranch oyster crackers.

Except I had a problem.  There are no oyster crackers to be found in Japan.  So I improvised.

Don’t laugh.  It worked.


Ranch Goldfish

Ingredients:
  • 1/2 teaspoon dill weed
  • 1/4 cup canola oil
  • 3 bags Pepperidge Farm saltine goldfish
  • 1packet Hidden Valley Ranch Dressing mix

Place crackers in a large bowl.  Pour oil over crackers and stir until all the fishies are coated.  Add dressing mix and garlic powder.  Bake on an ungreased baking sheet at 250 degrees for 15 minutes.  Stir every five minutes or so.  Store in a plastic container or serve it to your kids while they sit happily at the table doing Christmas puzzles.