Showing posts with label dessert. Show all posts

Tuesday, October 9, 2012

Gooey Butter Pumpkin Cake

This blog post is going to be about a dessert….one of my favs, in fact.  But first I have to mention something about hair….my hair, in fact.  ( Am I allowed to use “in fact” like that in a sentence?) 

I have fairly curly hair.  Back in the day when I was a cosmetologist, people used to want a perm just like mine….but mine wasn’t a perm.  It was totally cool in the 90’s to have big curly hair like mine.  But now it’s just a mess.  Here’s a picture of me and my hair in Hawaii.
Sometimes I try and straighten my hair.  It’s pretty cool when I do that, but it takes me about an hour and that makes me crazy.

Mostly I just throw it up in a messy pony.  Like this morning, when my husband and I took the dog for a walk and I was thinking it looked pretty good…..ponytail with loose curly tendrils gently blowing in the breeze.  My husband even commented, “Nice hair.”  Evidently, I missed the sarcasm in his voice because when I looked in the mirror when I got home, this is what I witnessed……
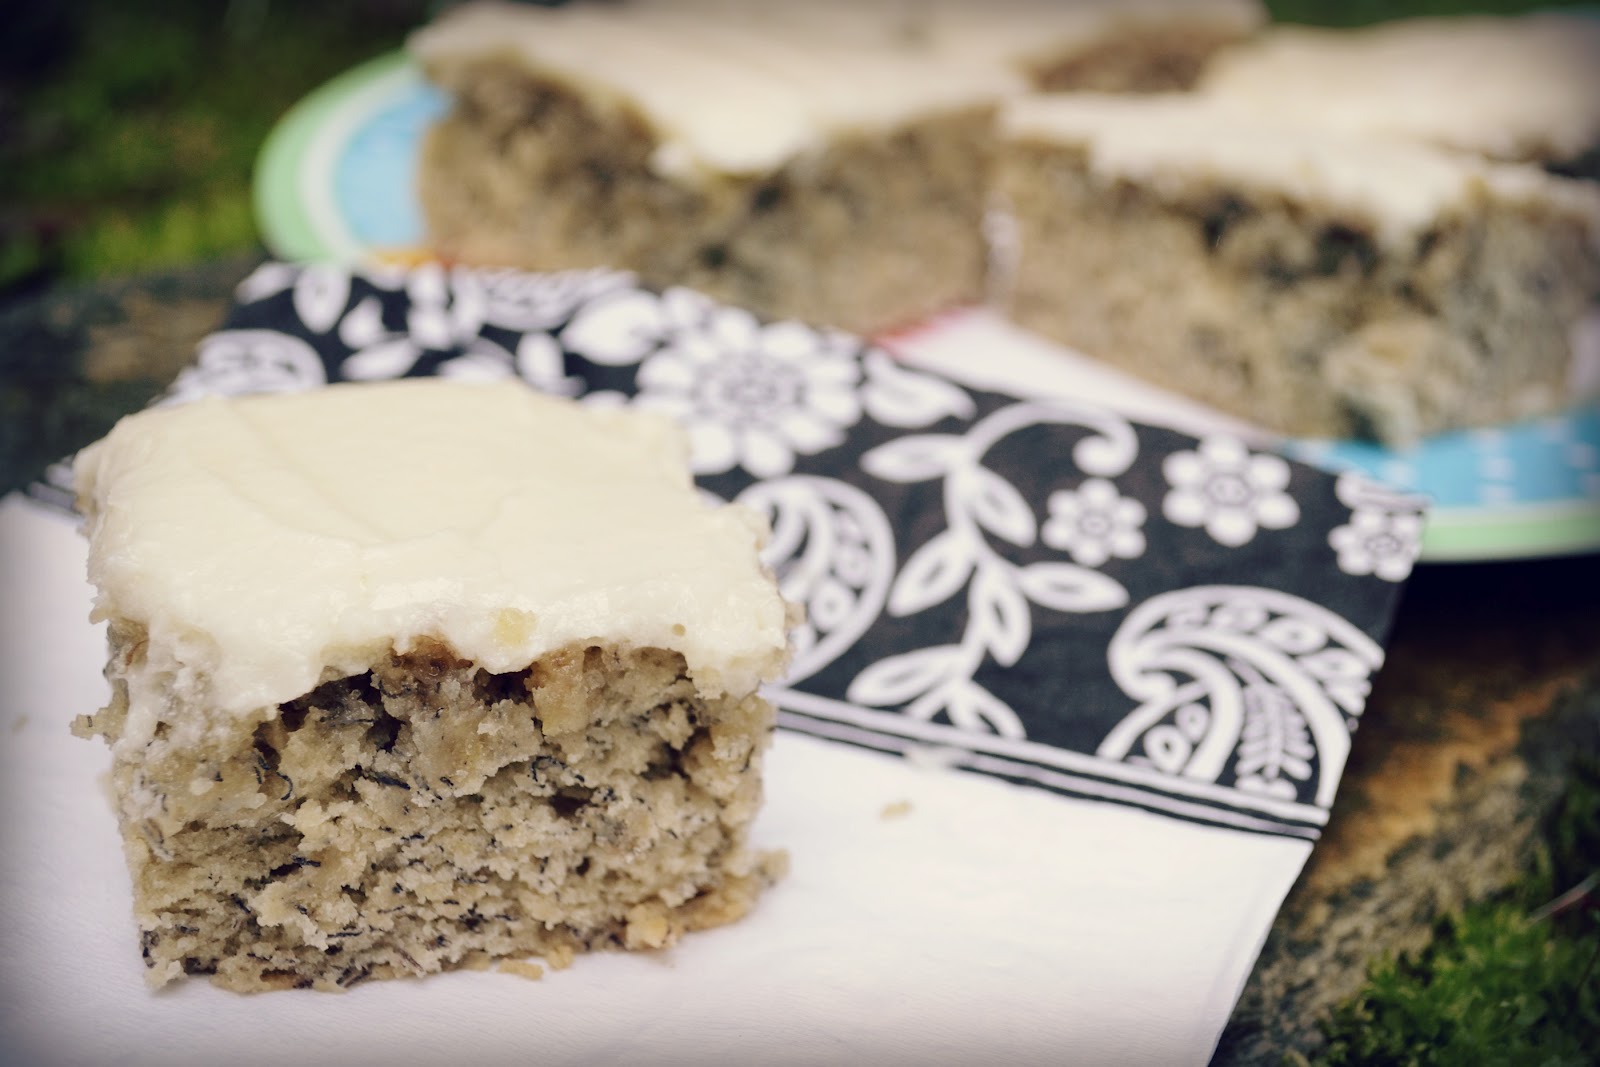
Looks like I need a cup of coffee and some of the Gooey Butter Pumpkin Cake that I made last night, for breakfast.

Gooey Butter Pumpkin Cake
TGFPD (That’s Thank Goodness for PaulaDeen)

Ingredients 

Cake:
1 18 1/4-ounce package yellow cake mix 
1 egg
8 tablespoons butter, melted

Filling:
1 15-ounce can of pumpkin
1 8-ounce package cream cheese, softened 
3 eggs 
1 teaspoon vanilla
8 tablespoons butter, melted
1 16-ounce box powdered sugar
1 teaspoon cinnamon
1 teaspoon nutmeg

Directions

Preheat oven to 350 degrees.

To make the cake, combine all of the ingredients and mix well.  Pat the mixture into a lightly greased 13x9-inch baking pan. 

Prepare filling:
In a large bowl, beat the cream cheese and pumpkin until smooth.  Add the eggs, vanilla, and butter and beat together. Next, add the powdered sugar, cinnamon, nutmeg, and mix well. Spread pumpkin mixture over cake batter and bake for 40 to 50 minutes.  Make sure not to over bake as the center should be a little gooey.
Serve with fresh whipped cream.  
Making a bad hair day better.....one blog post at a time.  Enjoy!


Linking up with:

Friday, June 15, 2012

Crispy Bars

I am a firm believer in ‘Everything happens for a reason.’  Like that one time when I dated a guy for a year, then was engaged for a year, then called the wedding off six weeks before the knot was tied.  All that happened so I could get my almost-mother-in-law’s Banana Crème Pie recipe.  I’ll share that recipe with you all one day, but you should know that the drama and heartache of that relationship has been well well worth an occasional slice of that pie.

Today though, I want to tell you about another time.  The time we moved to Minnesota.
 
We left our Air Force life, eager for my husband to go into private practice. (He was a young strappy dentist.)  In a cute little small town, we bought our first house, and with our three incredibly young children, decided that this was the place that we were going to raise our young family.

I’ll just some up our experience in few words.  Mosquito bites, mortgage, Life Flight, mid-life crises, poop, snow shovels, small town gossip, and 100 proof Southern Comfort.  All this in temperatures well below freezing.

But there are always diamonds in the middle of the coal, right?  (Like I didn’t marry the one guy, but I got a much better one. Yay me!)  So despite our lack of enthusiasm for the weather and mosquitos, we met some great neighbors who wanted to drink all of our Southern Comfort be our friends.   They would set up huge neighborhood block parties to watch the Packers and Vikings play football.  There were hot dishes (Minnesotan for casserole) galore, and don’t cha know…..Crispy Bars.  Yes.  The very reason we lost our life’s savings and almost our minds, was for these. 

Crispy Bars
My friend Dorie told me, “Oh this is soooo easy.  Just remember cuppa, cuppa, cuppa,", and she was right.  This recipe has stayed in my head for years.  You will need 1 cup of Karo Syrup, 1 cup of sugar, and 1 cup of peanut butter…..cuppa, cuppa, cuppa.  Melt these three ingredients in a saucepan on medium low heat until smooth.
  Pour this mixture over 6 cups of corn flakes and press into a buttered jelly roll pan.
Next, melt together one bag of semi-sweet chocolate chips and one bag of butterscotch chips in the microwave, stirring together until smooth.  Now pour this over the corn flake mixture and spread around until it is covered. 
Cut into small squares and serve when chocolate is set.
  (I usually end up putting mine in the fridge for about 30 minutes.)  Serves 24-36 depending on how small you cut them.

I’ll leave you with one more recipe.  A cuppa love, a cuppa detours in your path, and a cuppa God’s plan and not your own.  Mix together and you will get a sweet sweet journey.

Friday, May 4, 2012

Banana Cake With Vanilla Bean Frosting

It has been a big cake-fest at our house in the last couple of days.  I have had cake for breakfast for about 4 days straight now, and the scale is tipping slowly towards my anti-goal weight. 


My husband was promoted to Lieutenant Colonel the other day.  I wish everyone could experience a promotion ceremony in our United States military.  It is when one reaffirms their commitment and sacrifice to defending the freedoms we all take for granted every day.


And there is cake too.

Later that day, my smarty pants oldest daughter Abbey was inducted into the National Junior Honor Society.  We are so proud of her hard work and drive to do her best in everything she does.  (I think she gets it from her dad.)

So, we had more cake.

The cakes were good.  Chocolate, vanilla, frosting, GOOD.  But they were not even close to as good as the cake I made over the weekend.
I found this cake on Butter Yum.  I didn’t change a darn thing in the recipe except I doubled the frosting.  Yep, you heard me.  I DOUBLED it.  You should double it too.
Banana Cake with Vanilla Bean Frosting


Cake Ingredients:
·        2/3 cup sugar
·        ½ cup sour cream
·        1 egg
·        2 tablespoons butter, softened
·        2 mashed ripe bananas  (about ¾ cup)
·        1 tsp pure vanilla extract
·        1 cup flour
·        ¼ tsp salt
·        ½ tsp baking soda
Frosting Ingredients:
·        2 tablespoons butter, softened
·        ¼ cup heavy cream
·        ½ tsp vanilla bean paste or vanilla extract
·        1 ¼ cups confectioner’s sugar
Preheat the oven to 375 F.  (350 F for a glass pan.)  Mash your bananas.  (I did this in my mixer but the recipe is easily mixed together by hand.)  Cream bananas together with the sugar, sour cream, egg, 2 tablespoons softened butter, and vanilla.  Add flour, salt, and baking soda, and mix well.   Pour into a greased 8 x 8 pan.  Bake for 20 to 25 minutes or until a toothpick in the center comes out clean.  Cool completely before frosting.
To make the frosting, cream butter and confectioner’s sugar together until smooth.  Slowly add the heavy cream and stir until smooth.  Stir in vanilla.  Spread on cooled cake.


The original recipe actually calls this To Die For Banana Cake…..so watch out.  My husband and I had to have words over the last piece.  Even though he out-ranks me in the military, we all know who the General of this family is.  So guess who got the last piece?

Saturday, March 17, 2012

You're So Lucky I Made This

Happy St. Patrick’s Day!

I am a little ashamed to admit that I have no idea why we celebrate St. Patrick’s Day.  Other than the wearing of green, the pinching, and the green beer of course, I am at a loss.  I will have to Google it as soon as I finish this blog post.
If you are looking around the blogosphere however, you may find that St. Patrick’s day is all about the Shamrock Shake at McDonald’s.  They are evidently pretty good and now available at ALL McDonald’s this year.  Except, dear dear Ronald, you seem to have forgotten all the McDonald’s in Japan.  What’s up with that?
Lucky for us, there is no shortage of “copy-cat” recipes on the internet.  And as usual, I am adding my own special touches, which will undoubtedly make them much much better than the real thing.  Plus, it will be much much easier than driving three arguing sisters through the drive-thru at Micky D’s……which I probably wouldn’t do even if I could.
So here they are folks! My…………
You’re So Lucky I Made These For You Mint Milkshakes

Ingredients:
·        2 cups of vanilla ice cream (I used Dryer's 1/2 Fat Vanilla)
·        1 cup milk
·        ½ tsp peppermint extract
·        ¼ tsp green food coloring
·        Whipped topping
·        Shaved or chopped up Andes mints


Put the ice cream, milk, peppermint, and food coloring in a blender.  Blend until smooth.  Pour into glasses.  Top with whipped cream.  I chose Reddi Whip because I NEVER buy it and the girls are always begging for it. 
Don't forget the green fingernails.
Finally, sprinkle on the mint chocolate bits.
Drink it right away.  Don’t take pictures for your blog or you have to drink the melted one.  Boo. 
Goal #13.  Make a “green” lunch or special treat for Brian and the girls on St. Patrick’s Day.  Complete! (101 Goals in 2012)

PS  By using the ½ Fat Vanilla Ice Cream the Mint Milkshake recipe is only 275 calories vs. 423 for a medium McDonalds Shamrock Shake!  This recipe makes two servings.

Friday, February 3, 2012

Caramel Corn

Every year, my wonderful sister in law sends us a HUGE package of goodies for Christmas.  By goodies, I mean things like homemade toffee, gingerbread, and mini banana breads.  This may not sound like too big of a deal, but some years, depending on where we are living, she has to send the package half way around the world.  She lovingly wraps up the breads and cookies so they can make it to foreign lands….like Japan, Germany, and Mississippi. 

I should say we most look forward to this package because it is full of little pieces of love from home.  But if I be totally honest, the main reason that I want it is because it always always always contains Caramel Corn.

Inevitably I end up being all grinchy about this delicious stuff because there is simply not enough to stuff non-stop into my mouth, and still be able to share with the rest of my family.  So this year, I was forced to make my own.

This recipe is from Paula Dean, and not from my sister-in-law, but it tastes the same. (I don’t actually have the recipe from her.) I wouldn’t be surprised if my SIL was Paula’s personal recipe tester or something like that.  Carol….you are a baking/cooking superstar! 

Caramel Corn
Via Paula Deen www.foodnetwork.com


Ingredients:

  • 1 cup butter
  • 2 cups packed brown sugar
  • 1 teaspoon salt
  • 1/2 cup light corn syrup
  • 1 teaspoon baking soda

Preheat oven to 200 degrees F.  Over medium heat, combine first 4 ingredients and boil for 5 minutes. Remove from heat; stir in baking soda. Stir well. Pour over 8 quarts popped corn. Stir to coat well. Bake in large roaster or pan(I used two cookie sheets) for 1 hour, stirring every 15 minutes. Spread on waxed paper to dry.


Thursday, January 26, 2012

Sweet Sweet Sushi

The middle girlie, Allie, had her end of the semester party in Japanese class yesterday.  A year ago, I would have totally stressed if a kid came home and said, “Hey mom, I need a cool snack for class and it has to be Japanese.”  But now I have Pinterest , and I am set free to create amazing goodies for the classroom, that are the envy of all…..except for maybe the other mom’s who are getting ideas from pinning also. 
I found this idea on allrecipes.com, but it wasn't really a recipe.....just a thumbnail of a rice krispy treat idea.  So,  I used my Aunt Julie’s famous Rice Krispy Bar Recipe, the thumbnail pic, and a little imagination, and came up with Sweet Sweet Sushi.

Sweet Sweet Sushi


Ingredients:
·        6 cups crisp rice cereal
·        1 bag miniature marshmallows
·        ¼ cup butter or margarine
·        1 bag Swedish Fish candies
·        1 box Fruit By The Foot (fruit roll-up thingies)
In a large bowl, melt the butter in the microwave for 45 seconds.  Add the marshmallows and microwave for another 45 seconds.  Stir.  Microwave for another 45 seconds then stir until smooth.  Dump the crispy cereal on top of the mallowy goodness.  Stir together until combined. 
After the mixture has cooled for 10 minutes, butter your hands and mold fistfuls of the rice krispy mixture into the “rolls”, and place each one onto some buttered wax paper.  I was able to make 24 pieces.
Next, set a Swedish fish on the top of each roll.  Cut about a 3 inch piece of Fruit By The Foot and wrap it around the rice crispy roll AND the fish.  You can press the two ends of the fruit roll together at the bottom.  The whole roll is sticky enough that it holds itself together.  So easy, your kids can even do it!
Allie took them to her class and everyone LOVED them.  Most importantly, I retained my title as Pretty Much the Coolest Mom on the Planet.  Okay, maybe just the coolest mom in Japan!   


Linked up with:


UndertheTableandDreaming

Friday, December 23, 2011

Christmas Tree Shortbread Cookies

Lights are twinkling, Christmas music is jingling, and the hot buttered rum is errrr…….rumming.  Yes, the hot buttered rum is rumming.  Excitement and anticipation abounds at our house because it is Christmas Eve!


Amber, my youngest, is the most excited of us all.  Early this morning she sat at the table making a letter/picture for Santa.  (From the picture above you may note that we also need to do some spelling practice over this Christmas break.)


I made some cookies yesterday just so Amber could leave some with her note.  I have it on good authority that Santa often prefers a shortbread type of cookie…..like what you might have with some SleepyTime tea.  These cookies from Better Homes and Gardens looked like a good choice.  


Well HO-HO-HO to BHG!  Thanks for telling me that it will take about 2 hours to roll 396 little balls to complete the entire recipe!  After rolling 166, I gave up and settled for just fifteen cookies instead of three dozen.

Regardless of the effort, they are a perfect little buttery cookie and they are very cute, don’t you think?


Christmas Tree Shortbread Cookies

Ingredients:
·        1 cup butter softened
·        ½ cup sugar
·        1 Tablespoon milk
·        1 teaspoon vanilla
·        2 ¼ cups flour
·        Powdered sugar icing to drizzle
·        Decorative candies

In a large bowl beat butter with an electric mixer on medium to high speed for 30 seconds. Add sugar. Beat until combined, scraping sides of bowl occasionally. Beat in milk and vanilla until combined. Beat in as much of the flour as you can with the mixer. Using a wooden spoon, stir in any remaining flour. Remove 1/2 cup of the dough. Tint the remaining dough with green food coloring.

Preheat oven to 325 degrees F. For each cookie, use the green dough to shape ten 1/2-inch balls. On an ungreased cookie sheet, arrange balls in a row of four, topped by a row of three, then two, then one on top. As you arrange the balls, gently press them into each other. Use the plain dough to make a 3/4-inch ball and place it at the bottom of the tree for a trunk. Repeat with the remaining dough, leaving 2 inches between cookies on cookie sheet.

Bake for 10 to 12 minutes or until edges are light brown.  Cool on cookie sheet for 2  minutes. Carefully transfer cookies to a wire rack; let cool.  Drizzle icing back and forth over cookies to look like strings for lights.  Add decorative candies to icing.  Let stand until icing sets.


Give yourself a big gold star if you rolled ALL the little balls and made the 3 dozen cookies.  You are my hero.

Wednesday, December 21, 2011

Candy Cane Kiss Cookie Bark

I have been resisting making sugar cookies this  year. (Here’s My Fav. Recipe)  I just don’t have the energy to roll, cut, and decorate even though I LOVE them so.
But alas, it is Christmas.  I made soup, sixteen of my mom’s famous cheese balls, and even did a craft…..but no desserts or cookies.  My husband just isn’t satisfied with a bowl of M & M’s and the kids are begging to make some goodies to take to our neighbors.
I bought about one hundred bags of Hershey’s Candy Cane kisses because they always run out quickly at the commissary and those things are the bomb diggity.  But even I can’t eat one hundred bags.  (Okay, maybe I don’t have one hundred bags, but I have a lot.)  So I googled Candy Cane Kiss recipes, found one that was easy enough for my daughter to make, and dug deep into my Christmas soul to grant her and a friend permission to use my Kitchen Aid. 
Thank you Abbey & Sydney for helping me make these!  They will be perfect for Santa!
Peppermint Bark Cookies
(Recipe from www.recipegirl.com some ingredients
have been modified.)


Ingredients:
·        2 cups all purpose flour
·        1/4 teaspoon salt
·        1 cup (2 sticks) unsalted butter, at room temperature
·        1 cup granulated sugar
·        1 teaspoon vanilla extract
·        1 large egg yolk
·        1 bag semi-sweet chocolate chips
·        1 cup chopped Hershey's Candy Cane Kisses (or use crumbled candy canes)
Directions:
 1. Preheat oven to 350°F. Spray 13x9x2-inch metal baking pan with nonstick spray. Line bottom of pan with long strip of 9-inch-wide parchment paper, leaving overhang on both short sides of pan.
2. Whisk flour and salt in medium bowl. Using electric mixer, beat butter in large bowl until creamy, about 2 minutes. Gradually beat in sugar. Continue beating until mixture is light and fluffy, stopping occasionally to scrape down sides of bowl, about 3 minutes. Beat in vanilla, then egg yolk. Gradually add flour mixture, beating on low speed just to blend.
 3. Drop dough by the tablespoonful into prepared baking pan, spacing evenly. Using moistened fingertips, press dough to form even layer over bottom of pan. Pierce dough all over with fork.
 4. Bake cookie base until light golden brown and slightly puffed and edges begin to come away from sides of pan, about 30 minutes. Place pan on rack; immediately sprinkle chocolate chips over cookie. Let stand until chocolate softens, about 3 minutes. Spread bittersweet chocolate over top of cookie in thin even layer. Immediately sprinkle chopped candy cane kisses over the chocolate layer.
 5. Chill until chocolate is set.
 6. Using paper overhang as aid, lift cookie from pan and transfer to work surface. Using large knife, cut cookie into irregular pieces.


Linking up with........

The Sasse Life...uber cute blog!
Bassgiraffe's Thoughts Thursday Blog Hop